
Why make a bin store with a green roof?
I’m not going to to that annoying thing food blogs do when you have to wade through the writer’s life story to get to the recipe. However, I do feel it’s worthwhile giving a bit of context to why this is a cool thing to do.
As well as being cute as all hell, green roofs really help with water management and biodiversity. Decades of paving over our front gardens has created an ecological nightmare. Rainwater no longer slowed and absorbed by plants, is overwhelming our drains and causing flash flooding.
Read more….
- RHS guide to water management in your garden
- Leon Davis’ Unpave the Way Garden at RHS Tatton Park
- Government guidance on resurfacing front gardens
Apologies for another absolute downer, but we are in the midst of a biodiversity crisis. Simply put, when we have more plants in our gardens, there is more food for pollinators. There are more habitats for wildlife too. Green roofs are great for increasing your planting area and for slowing down and absorbing rainwater. By having one, or several, green roofs you not only create something nice to look at, you also get to feel pretty damn smug about it.
My bin store was part of my front garden redesign. I’ll explain it in more detail at a later date. – Stay tuned.
Make or buy?
There are companies that will build a green roof bin store for you. Additionally, there are many kits you can buy online and assemble yourself. These are great options. The decent ones tend to come in at around £600 for a double bin store – (without plants). I spent around £300 on mine, including plants and growing medium/aggregates, but I was using some materials I already had. Time is also a factor and these kits come pre-measured – they just need assembling, so it may well be worth a few hundred more to save a weekend of shopping, cutting, sanding etc. You can get cheaper, but you often have to settle for the standard dimensions or low quality materials. I also enjoyed the process and the feeling of accomplishment from building it myself. But then, I am awfully desperate for attention and approval. You however, may not be the youngest member of a large family, and therefore have more self-assurance. These are all factors to consider.
I wouldn’t describe making a bin store yourself to be a particularly difficult job, but then I do this kind of stuff a lot. I converted our shed into a home office (with under floor heating – ooh get me) and do a lot of DIY. My boyfriend, who can’t be doing with that sort of nonsense, thinks it’s at an ‘intermediate’ level. Ultimately a job is always going to be difficult if you don’t have the right tools. So take a list at the list below and if you already own everything – go for it.
Tools
- Hand saw – I also used my circular saw, because I have one, but it really isn’t necessary. Just me showing off really
- Hacksaw with a metal blade
- Tape measure
- Spirit level
- Nail gun (nice to have, not essential, hammer would do it.)
- Electric screwdriver – If you don’t have one, it’s worth investing. You could use a manual, but you’ll end up turning your hand into a lego man-like claw.
- Drill – to pre-drill holes for larger screws, otherwise you risk splitting the wood.
- Paintbrush
OK. Down to business.
Draw up a design.
This doesn’t have to look good – mine looks like a five year-old drew it on an Etch-A-Sketch. I used different colours to represent the lengths I was using, orange = 900mm, blue= 1300mm, green 1200mm and so on. Seeing a sketch on paper makes you think about how you are going to put the thing together. My rough plan is below, but it’s not a template. Bins come in different shapes and sizes, as do bikes, prams, lawnmowers, or anything else you might want to build a store for. I had to factor in a drain pipe running through the back of my bin store and needing access to the gas meter. You’ll have your own issues with uneven surfaces, number of bins or materials you want to use.

Measure twice, cut once
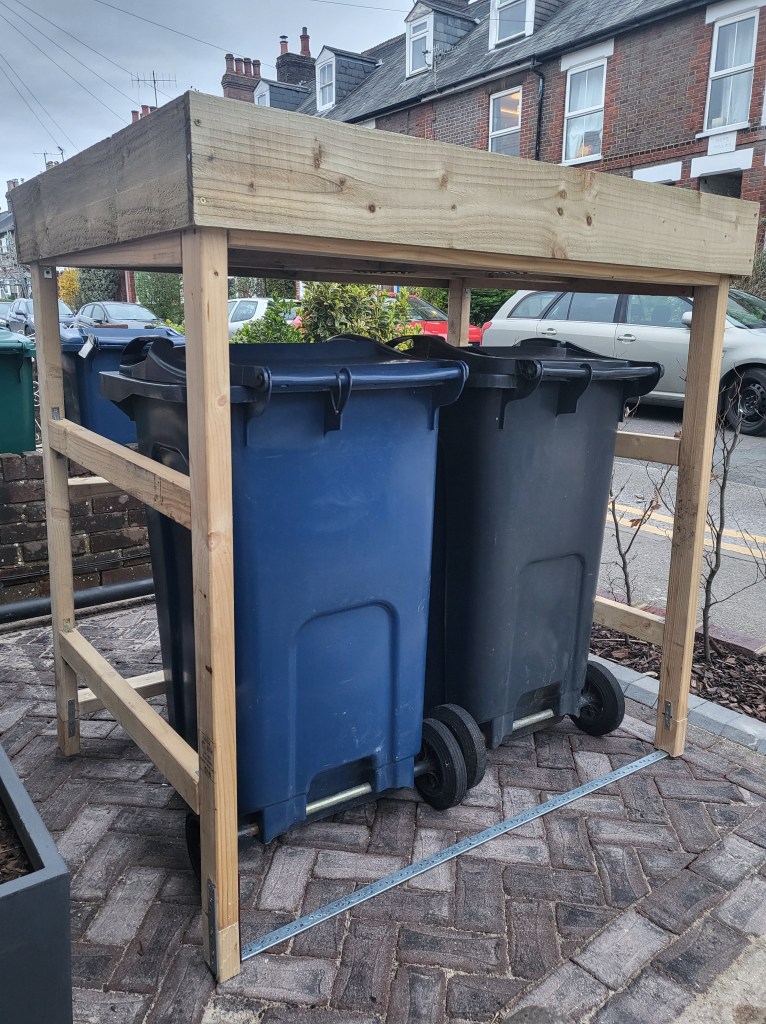
I have two bins roughly 1150 x 600 x 700. I also factored in 50mm head room to make it easier to wheel them in and out and a 50mm drop from back to the front to let water drain away. You may prefer the slope to be front to back – that makes a lot of sense as it keeps the guttering out of the way – but I wanted the roof to be angled towards the front door so I could see the plants. So these were my dimensions. yours may be different.
Making the frame
The frame is made from studwork timber, I got mine from Wikes, but you can get them at any builders merchants. They are £3.85 for 2400mm and I used nine. The picture below, doesn’t include the back struts in a v shape which keep the frame square. These are especially important with the weight of the roof. Without them, the frame is likely to lean and collapse.
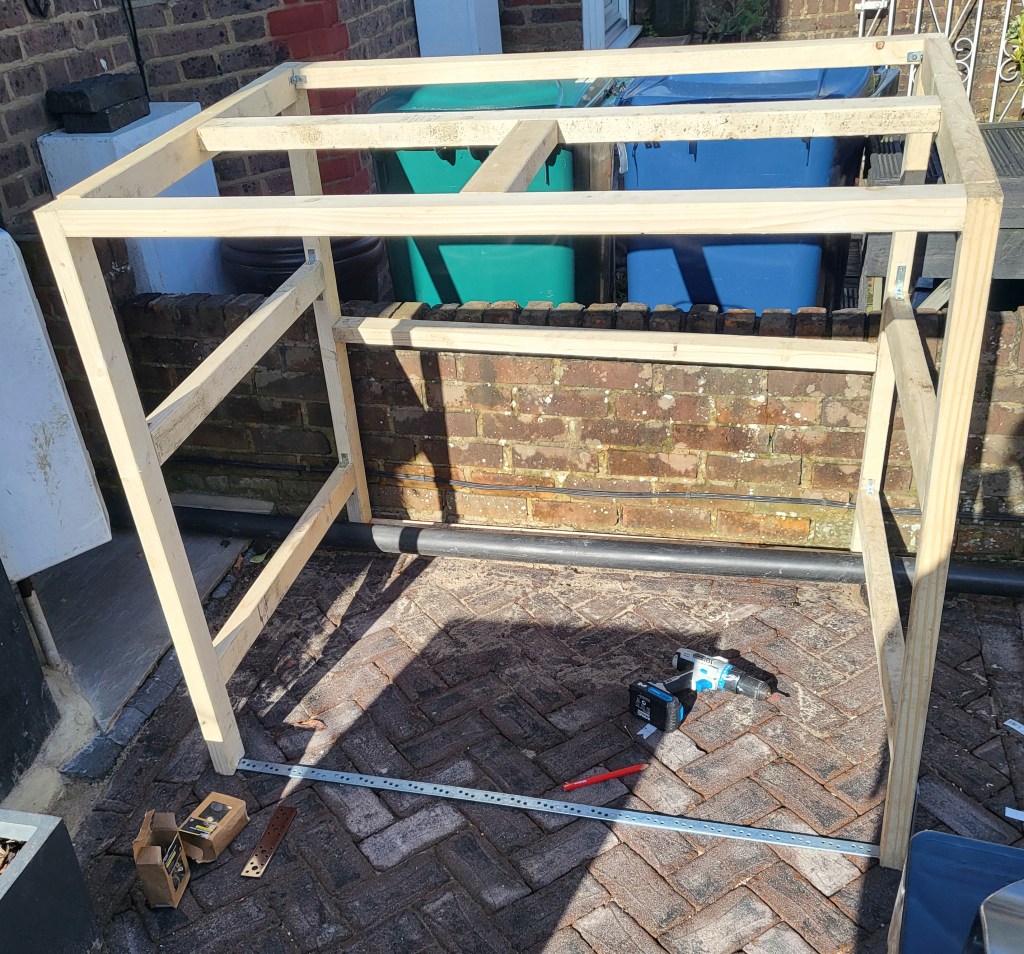
To keep the frame square and solid – but still be able to get the bins in and out – I used a galvanised restraint strap to connect the front legs.
The roof was a sheet of MDF which cost about £20. I nailed it to the top of the frame, leaving a slight gap at the front for rainwater to filter down into the drain. The walls of the roof were gravel boards which cost about £20.
For the walls, people often use decking board, which is a good call, as they are sturdy and treated, so they should last a while. I find them a bit heavy and expensive, plus I had a load of reclaimed fence boards left over from another project, so I used that. To buy new fence board for this job you’d need around 20, depending on the dimensions of your bin store. and they are around £3 each.
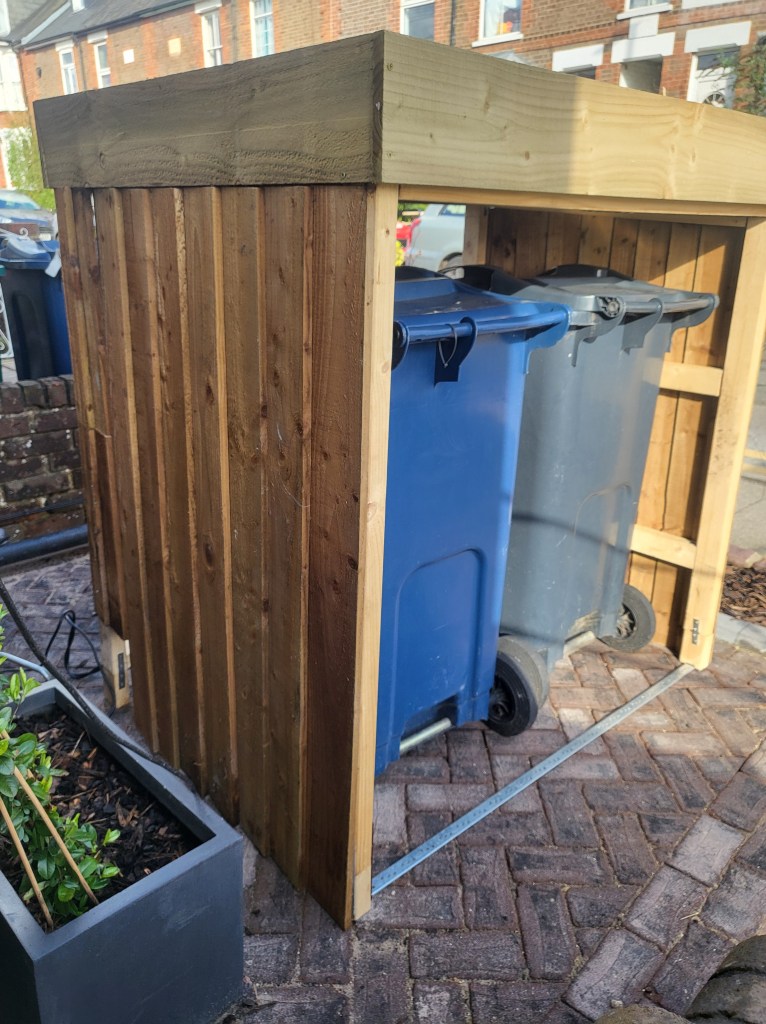
Now is a good time to get out your paintbrush. Again, I used what I already had in the form of leftover fence paint, which happened to be slate grey, but feel free to go nuts and paint it something more exotic.
Adding a drain
Last build job was to secure a drain to channel the rainwater. This makes sure that the water is flowing to a soakaway rather than pooling in front of your store. I went with a chain drain, where the water is directed down the chain and into a nearby bed because, it’s efficient, easy to install and looks cool.
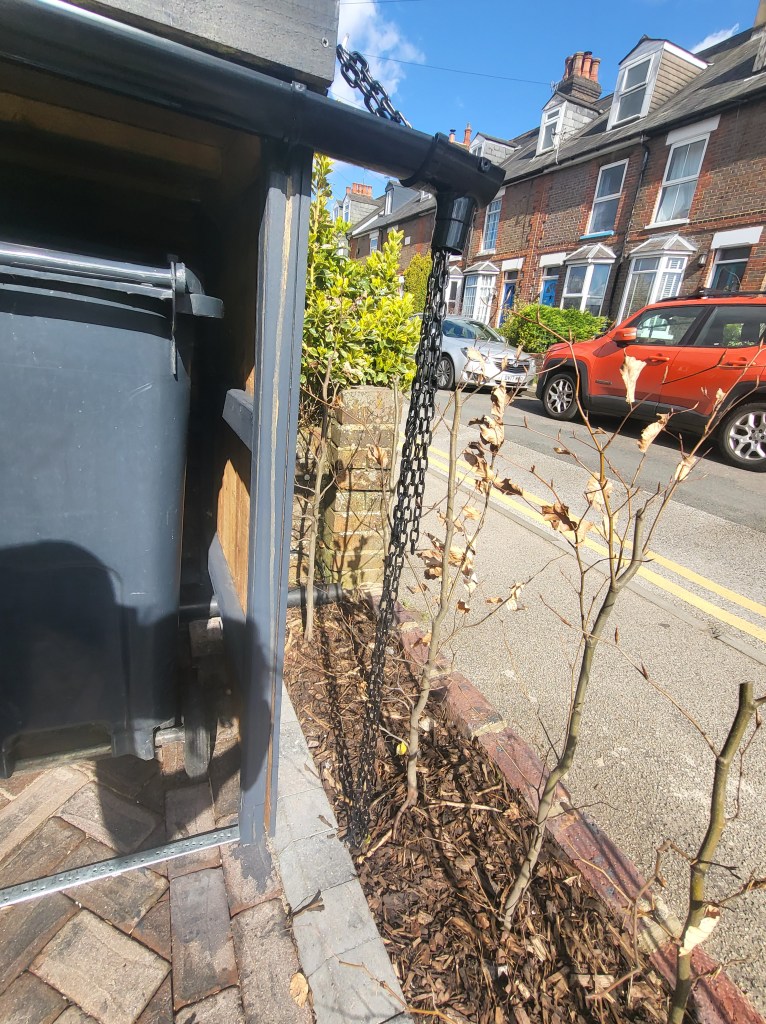
I attached a length of small guttering across the front of the store, capping it with a down pipe attachment, but rather than fitting a down pipe I fed a chain through, and hooked it to the side of the store. Then, using a camping peg, I pinned the end of the chain into the bed where my beech hedge grows, next to the shed store.
That’s it. Simple.
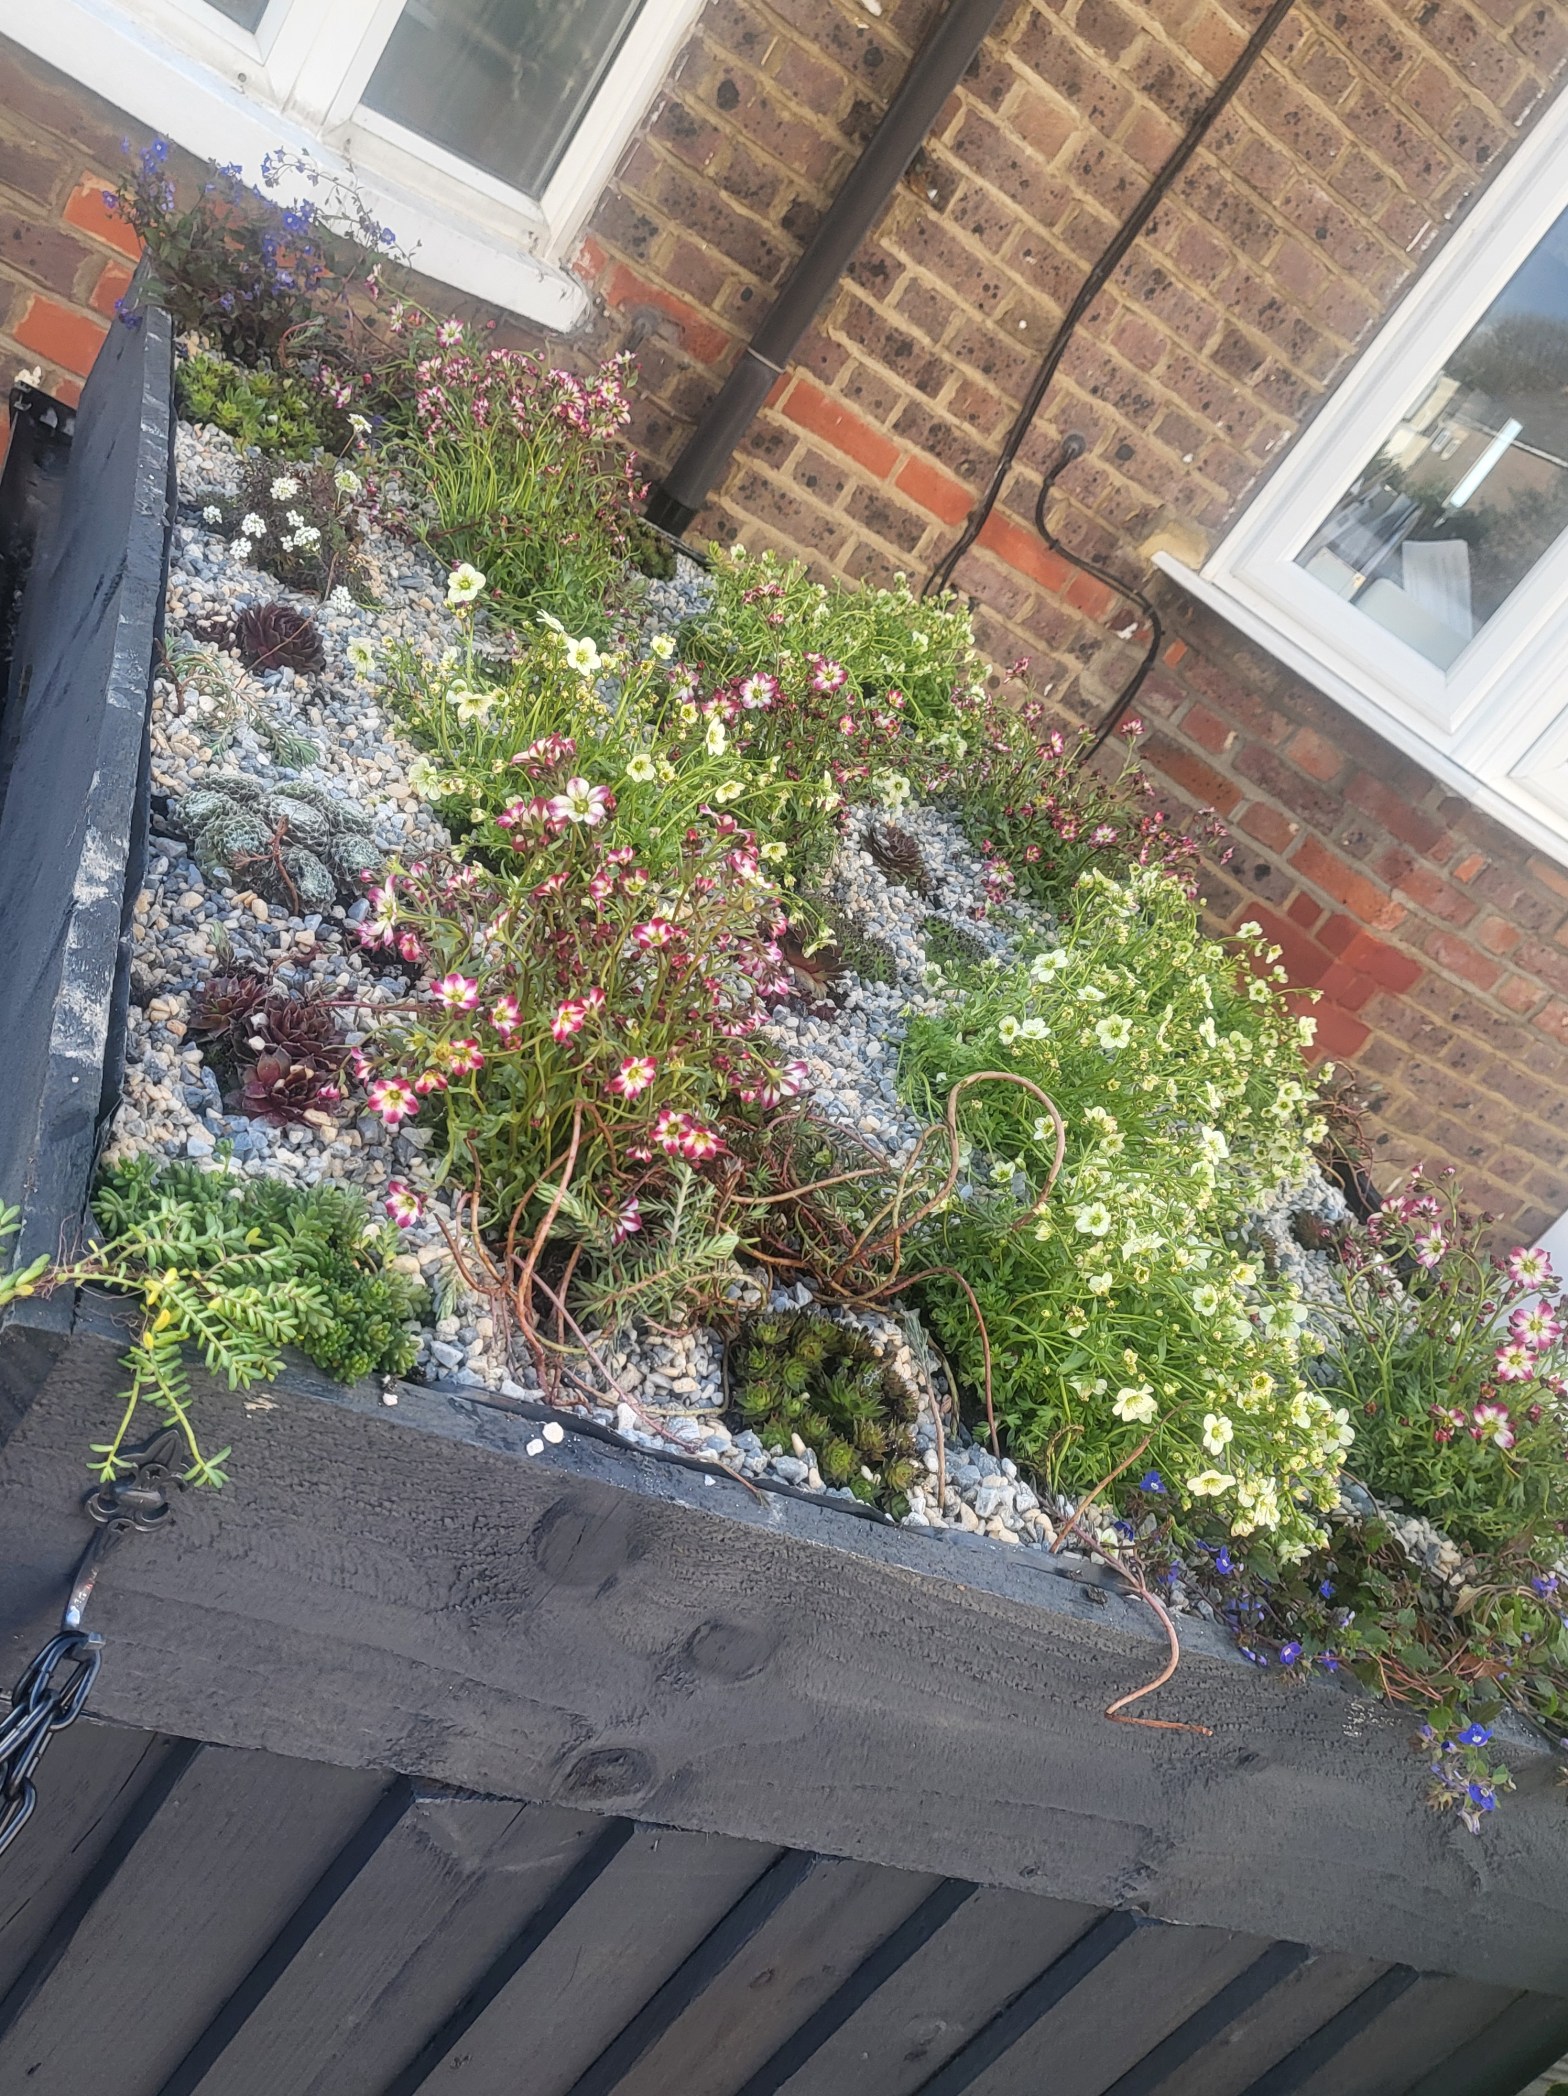
Planting up the roof
This is the fun bit……
There are loads of different types of green roof, and they are all glorious. You can buy pre-sown wildflower turf or sedum blocks which come not only planted, but already incorporating the different layers you need so that you just fit them on your roof and you are good to go.
These are great – but expensive and, as it isn’t all that difficult, for a small project like this, there’s no reason not to do it yourself.
On a basic level, a green roof needs four layers
- Waterproof membrane – you can buy sheeting. I used heavy duty bin bags taped together and stapled to the sides and base of the roof to create a lining. Remembering to cut along the bottom of the slope (remember that gap in the roof) so the water can escape into the drain.
- Moisture retentive layer – there are lots of specialist fabrics designed specifically for this. I used an old wool blanket. Old jumpers are good too. Make sure the layer is not too thick or you’ll reduce your planting depth. just a few millimeters is fine.
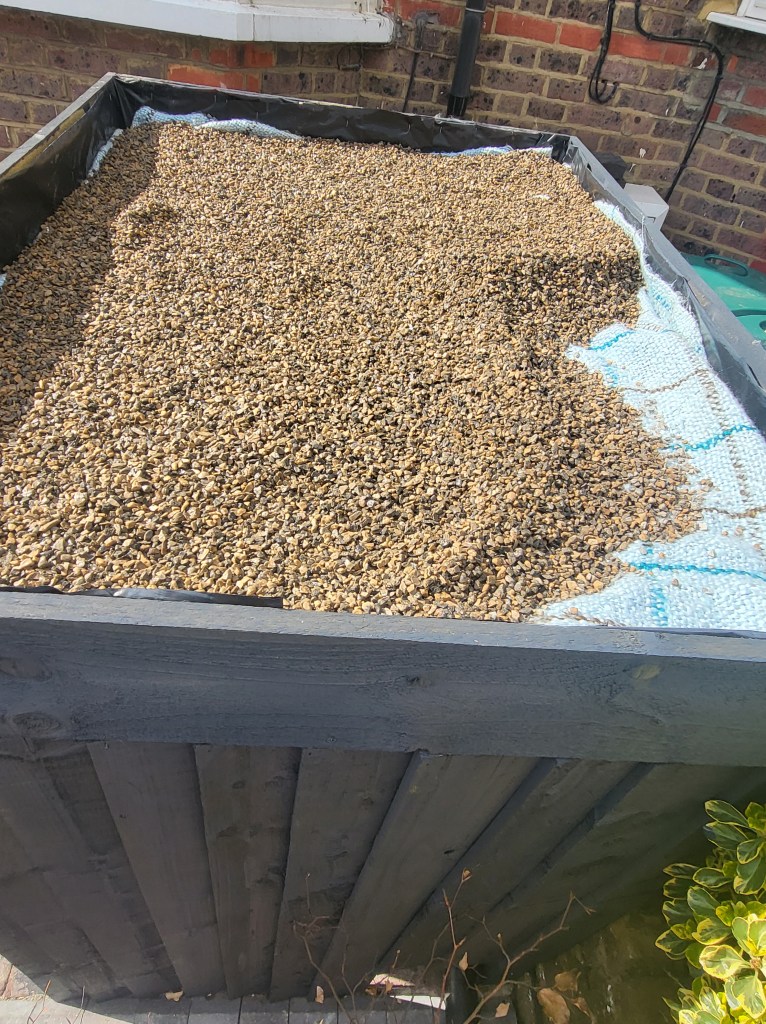
- Drainage layer – Again – and I can’t stress this enough – there are loads of options for this available online. I used a couple of centimeters of gravel.
- Growing medium – Finally spread over two bags of peat-free alpine compost and it was all ready for the plants.
Planting up
There’s no reason why you can’t plant pretty much anything in the green roof. Essentially it’s just a container, so as long as you pick plants appropriate for the conditions, you should be fine. However, given that those conditions are often exposed, high rainfall, shallow rooting, there are some obvious contenders. They tend to be alpine plants and they are a good choice because they are low-maintenance and attractive to pollinators. Wildflower mixes aren’t really suitable for this type of green roof because they usually need a bit more planting depth and a bit more moisture. But who am I to stop you giving them a go if you fancy it.
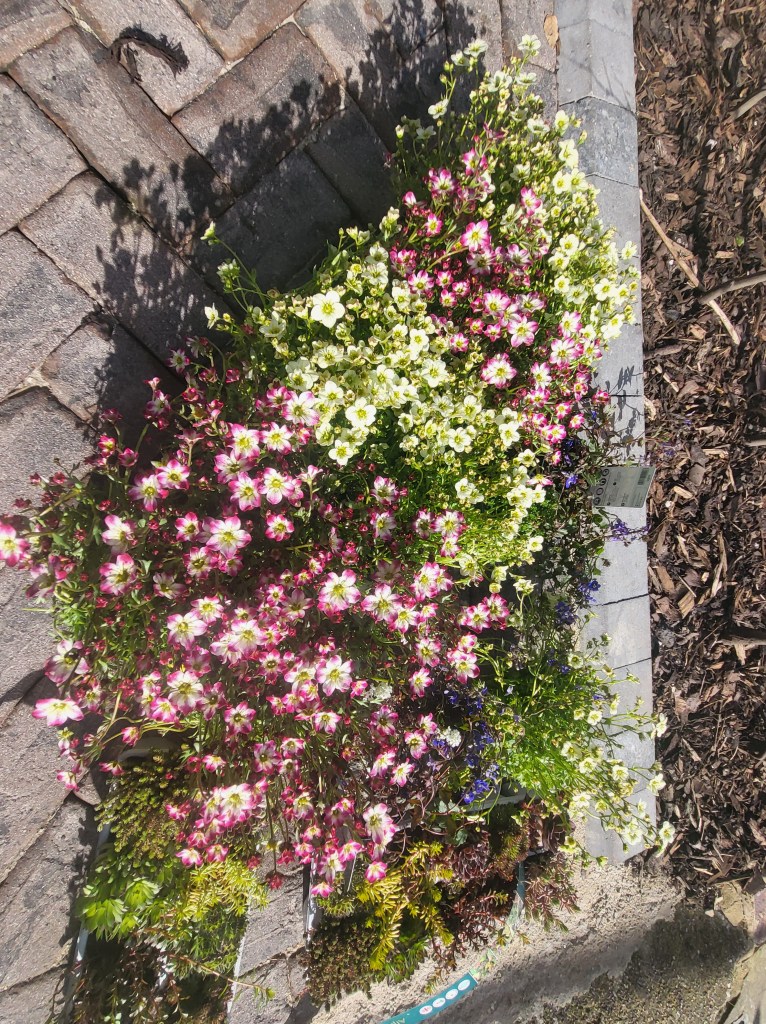
Saxifraga – (see above) I got a load of these on offer, so initially they made up most of the plants I put in. They were great for a season, but they were just too exposed to full sun and eventually dried out. If you have a bit more shade do use them, they are gorgeous and the insects love them.
Sempervivums – Aka houseleeks, or hen and chicks, these tough little plants are standard green roof fare. They need very little care and they will spread around. These now dominate my bin store roof. Not least because one of my favorite pastimes is to pick a bit off one plant and stick it in a bare patch to root and spread. They maybe aren’t as floral as some may like, but there are lots of variety in form and colour available.
Sedums – Similar to Sempervivums. These can come in so many different forms, you can start a collection, the weirder the better. They are a real hit with the kids who pass by.
Erigeron – aka fleabane, which doesn’t really do this pretty flower justice. Much like me they are cute and low maintenance, but can get invasive.
Thyme – I haven’t put any in, but I might do next year. Though, if you grow herbs for the kitchen by a road, remember to wash them before chucking them in the ragu.
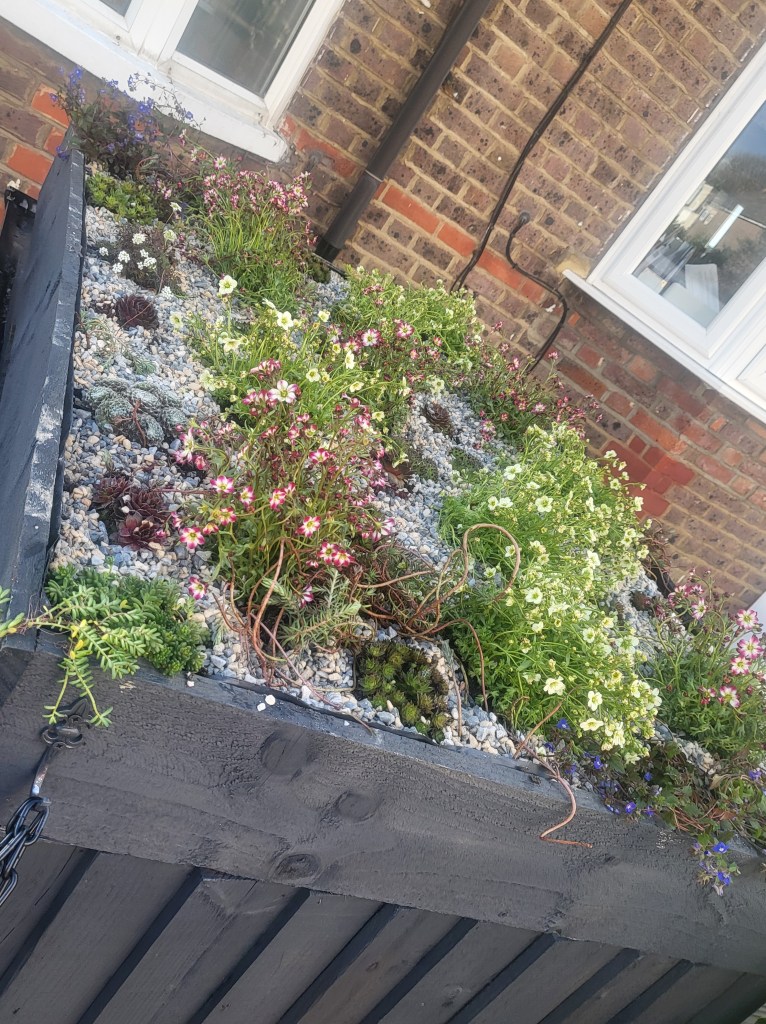
After popping the plants in, I top-dressed them with a layer of decorative gravel because it looks nice, improves drainage and helps to prevent weeds.
There’s nearly no maintenance, other than occasionally checking over the plants, replacing ones that are suffering and pulling out the odd unwelcome visitor (weeds seems a harsh word).
Costs
I used a lot of what I already have, and I’m afraid I didn’t keep an accurate record, so this is a very rough guide.
- Studwork timber = £35
- Fence boards = £60
- MDF = £20
- Gravel board = £20
- Galvanised strap & assorted plates to add extra support = £20
- Aggregates and compost =£50
- Plants = £60
- Fence paint = £10
- Guttering & Chain =£40
- Rough total = £305
I get lots of love for the bin store from my lovely neighbours and honestly, I think it took me less time to build than to write this how to post.
I recommend you give it a go, and if you lasted to the bottom of the page, thanks for reading.
Discover more from Jenny Laville
Subscribe to get the latest posts sent to your email.
